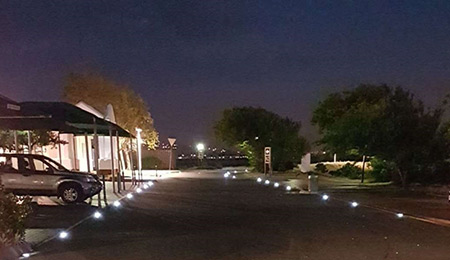
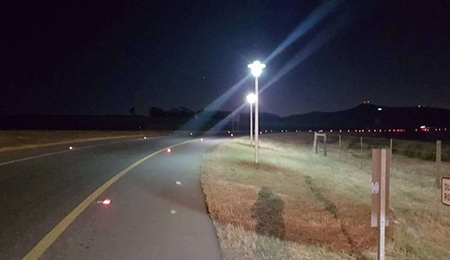
Step 4: Pouring Out the Hole with Adhesive to Install Solar Cat Eyes Road Stud
a. Please pay attention to the product description of the recommended adhesive. It explains how to prepare and handle the adhesive.
b. Preselect the RC-SRS-B2 product and place it next to the respective hole.
c. Use ladles to pour the adhesive into the holes. For one RC-SRS-B2 112mm an adhesive volume of 70 ml - 100 ml (depends on the dimensions of the drilled holes) is required. The required adhesive volume should be checked on the first installed RC-SRS-B2 product.
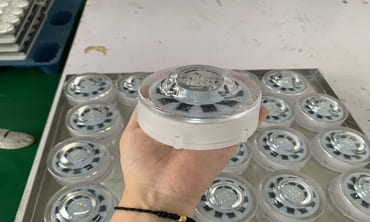
a. Handle the RC-SRS-B2 carefully and avoid rough contact with the asphalt to prevent scratches on the protection layer.
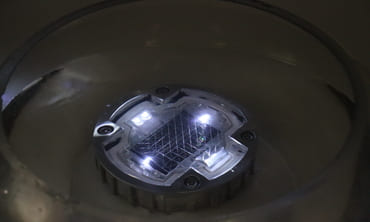
b. Push the RC-SRS-B2 into the hole with a twisting action to ensure that the adhesive is evenly distributed until the ring surface of the RC-SRS-B2 is at road level. Long-term adhesion can only be achieved if the adhesive swells out at the edges of the RC-SRS-B2.
a. The protection layer of the RC-SRS-B2 must not be visible after the installation. Ensure that any gap between the RC-SRS-B2 and the asphalt is fully covered with adhesive.
b. Any adhesive and dust on the exposed glass part of the RC-SRS-B2 must be cleaned off.
c. Allow the adhesive to cure at least as long as indicated in the adhesive instructions before the road is released for traffic.

.jpg)
.png)